
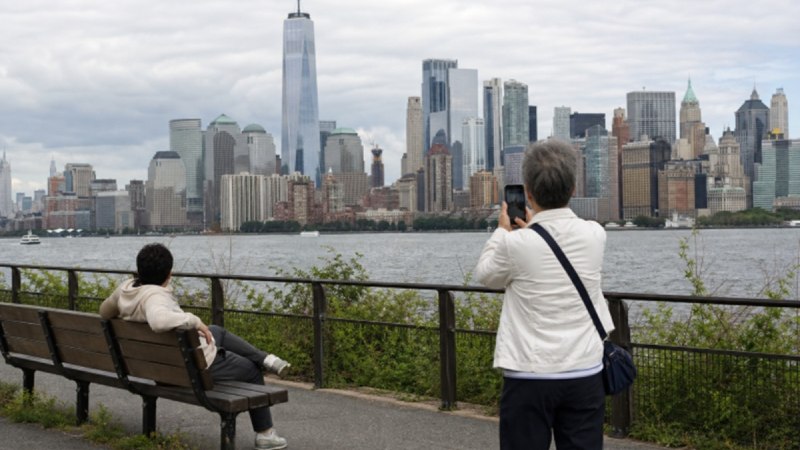
A great skyline day in New York City, New York, does not require racing from one famous spot to another. The city rewards a slower approach: choose one standout view, build the rest of the day nearby, and leave room for meals, weather changes, and the unexpected pleasures of a neighborhood walk. For visitors considering elevated NYC landmarks, it is wise to treat the observation deck as the day’s anchor rather than one item on an oversized checklist.
The goal is not to see every angle of Manhattan in a single day. It is to experience the skyline in a way that fits your energy, budget, mobility needs, and interests. A waterfront bench, a bridge approach, a public park, or a carefully timed indoor viewpoint can be just as memorable as a high-rise observation deck.
Why Planning Matters
New York City looks compact on a visitor’s map, but moving between neighborhoods can take longer than expected. Crowded sidewalks, subway transfers, station exits, security lines, elevators, and busy meal periods all add time. A more comfortable rule is to plan one major skyline experience, one nearby activity, and enough unstructured time to sit down, wander, or change course.
This approach also makes the city more enjoyable for mixed groups. One traveler may want architectural photographs, another may want a long lunch, and another may need frequent seating. A flexible itinerary makes space for all three without turning the day into a negotiation about the next train.
Choose Your Main View
A skyline experience can come from far more than a tall building. Start by deciding what you want to feel or photograph, then choose the setting that best supports that goal.
- Elevated viewpoints: Best for understanding the city’s scale, grid, waterways, and dense layers of buildings.
- Waterfront parks: Useful for wide views, open sky, reflections, and a calmer pace.
- Bridge walks: A strong choice for travelers who enjoy movement, structural details, and changing perspectives.
- Street-level views: Ideal for noticing Art Deco façades, older masonry, signage, and the contrast between historic and newer towers.
- Ferry rides: Helpful when you want shifting views without committing to a long walk.
Choose an elevated stop for scale, a waterfront stop for open compositions, and a bridge or neighborhood walk for architecture. If rain or strong wind seems possible, make an indoor viewpoint your primary plan and keep outdoor views as a bonus.
Build a Neighborhood-Based Route
Grouping stops by neighborhood saves both time and energy. Rather than crisscrossing Manhattan for short visits, select an area that offers a view, food, restrooms, and at least one additional point of interest.
Useful Route Patterns
- Midtown: Pair a skyline stop with classic commercial architecture, a public plaza, a library, or an indoor meal.
- Lower Manhattan: Combine harbor-facing views, historic streets, public spaces, and a waterfront walk.
- West Side: Connect modern development, river views, an elevated park, and nearby dining.
- Brooklyn-facing: Use a waterfront park or bridge view as the centerpiece, then finish with a neighborhood meal.
Fewer transfers usually create a better day. A 20-minute walk through an interesting area can be more rewarding than a short ride across town for a photo taken in a hurry.
Pick the Best Time of Day
Each part of the day creates a different skyline experience. Morning can offer cooler walking conditions and a quieter start. Midday brings bright light but may also bring glare and heat. Late afternoon works well for a meal, a relaxed walk, and a final weather check. Sunset offers changing color but requires patience, while evening emphasizes illuminated windows and the city’s energy.
Check the day’s forecast for Central Park before deciding when to be outdoors. Clouds, haze, wind, and rain can change visibility quickly, so it helps to choose a morning or evening viewpoint only after reviewing actual conditions.
Plan for Transit and Accessibility
Accessibility belongs in the first version of the itinerary. Before leaving, check step-free entrances, elevator locations, accessible restrooms, seating options, walking distances, and the number of transfers. The MTA’s accessibility station information can help travelers identify stations with accessibility features and review their route before entering the subway.
- Add time for long platforms, station exits, and elevator waits.
- Save directions and meeting points before going underground.
- Plan a rest stop after a major attraction or extended walk.
- Choose a shorter route if heat, rain, crowds, or limited mobility may affect comfort.
Prepare for Weather Changes
Weather affects both comfort and visibility. Summer heat can make exposed walks tiring, winter wind can feel sharper near the water, and haze can soften distant views. Carry water, light layers, sunscreen, supportive shoes, and compact rain protection. Keep at least one flexible hour in the schedule rather than filling every gap.
If conditions change, replace a long outdoor walk with a museum, market, library, or indoor cultural stop. You can also move an outdoor viewpoint later in the day, shorten the route, or focus on close architectural details when distant views are unclear. Check for attraction notices, transit changes, street closures, and major public events on the morning of your visit.
Sample One-Day Itinerary
- Morning: Eat breakfast near your first neighborhood and take a relaxed architecture walk.
- Late morning: Visit one main skyline viewpoint while energy is high.
- Midday: Have a longer meal and take an indoor break.
- Afternoon: Add one nearby park, museum, market, or historic area.
- Late afternoon: Recheck weather, transit, and crowd conditions.
- Evening: Finish with a waterfront stroll, an optional second view, or an unrushed dinner.
Families and visitors with limited mobility may prefer to skip the optional afternoon stop. Photographers may get better results by visiting fewer locations and staying longer at each one.
Simple Skyline Photography Tips
- Take a few wide images before looking for close building details.
- Use railings, trees, street signs, and bridge elements to add depth.
- Look for reflections in windows or pavement after rain.
- Try warmer late-day light for softer shadows and evening scenes for illuminated buildings.
- Pause before shooting so you can frame the skyline without feeling rushed.
Bookings, Breaks, and Budget
Reserve timed attractions, special events, and limited-entry experiences in advance. Keep parks, neighborhood walks, and casual meals flexible whenever possible. Build room in the budget for transit, meals, admissions, and a weather-related change of plan. Unless photography is the central purpose of the trip, one paid viewpoint plus a free public-space view is often enough.
Common Questions
How Many Skyline Stops Should You Plan?
Plan one main viewpoint and one optional second view. More than that can make the day feel rushed once walking, transfers, security, and meal breaks are included.
Is Morning or Evening Better?
Morning may suit travelers seeking a quieter start, while evening is appealing for city lights and atmosphere. Let weather, photography goals, and your group’s energy determine the choice.
Should Every Activity Be Booked?
No. Book activities with timed entry or limited capacity, then leave space for parks, walks, and meals that can adapt to the day.
Conclusion
A memorable New York City skyline day is built around intention, not a packed checklist. Pick one strong view, stay within a practical area, take comfortable breaks, and maintain a simple backup plan. When the route matches your group’s energy, accessibility needs, and interest in the city’s architecture, there is room to slow down and enjoy the skyline as more than a backdrop.